
Easy turban tying instructions
This turban looks super stylish — no hint of patient wear, simply very chic. The long crinkle cotton scarves used in this guide start from £15, with a handy discount when you buy three or more. Shop the full range →
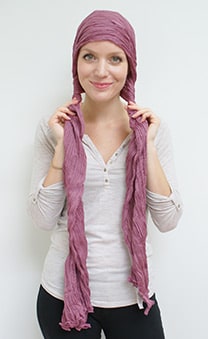
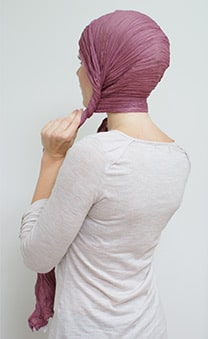
How to tie a turban with a scarf - Step 1
Take a long Suburban Turban scarf, open it out from its twist and fold it not quite in half along its length. Place it over your head and just a little off centre. (Our model has 65cms hanging on one side and 75cms hanging on the other side of her head.) Position it where you would like it on the brow and ensure the scarf covers your head to the nape of your neck. Then begin twisting the scarf on either side of your face to get a neat outline over the ears.
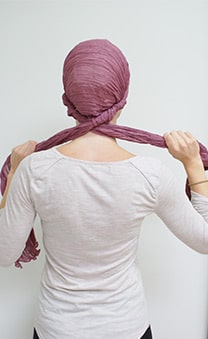
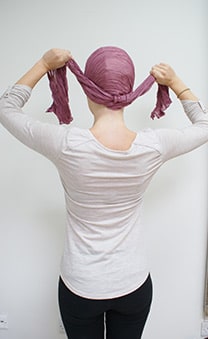
Turban tying - Step 2
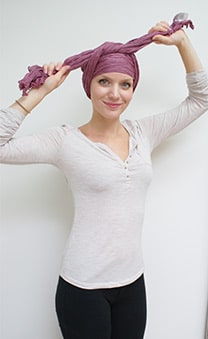
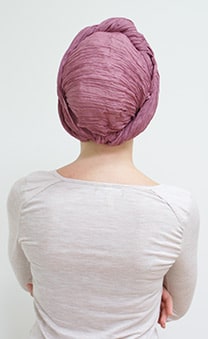
Cross over the scarf ends behind your head, ensuring you have crossed over on top of the scarf to totally cover the head from the back and then bring the scarf ends in front of you. At this point you can put one down, twist a little more or move your hands down the scarf and adjust the crossover. A back view mirror would be useful here although not essential as it can all be tidied up later once the knot is tied.
Turban tying - Step 3
Happy with the placement at the back, continue to wrap the scarf round the sides of the head and do the first stage of an ordinary granny knot off to one side. This will look far more flattering than doing it on top of you head!
Turban Tying - Step 4
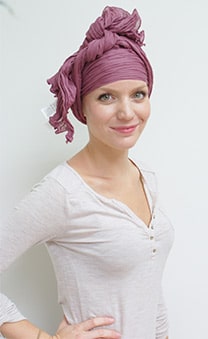
Give your arms a rest for a moment, the scarf won’t move if you let go now. You may wish to tuck in or re-adjust the scarf as it has gone round your head but this shouldn’t be necessary, as it seems to just follow through on its own.
Turban tying - Step 5
Take hold of the ends of the scarf again and adjust tightness of knot so that you feel secure. (The beauty of these cotton crinkle scarves is that the fabric ‘holds’, it won’t slip and it won’t work itself loose.) Then finalise the knot by taking left hand over right and turning it into a reef knot to secure, (this makes for a flatter knot). If that all sounds a bit technical an ordinary granny knot will do!
Turban Scarf - Step 6
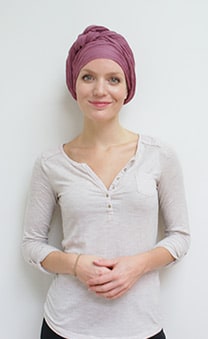
Tidy away ends by tucking in behind scarf at the front. With the pleated fabric this ‘hides away’ very easily and just adds a little flattering volume around the face. We hope you’ll agree this is a good looking scarf turban.
Ready to give it a try?
Our long crinkle cotton scarves work particularly well for turban tying — the textured fabric holds its shape, stays put all day, and won’t slip or unravel. Available in a range of dusky, skin-flattering colours. From £15 each — buy any 3 for £45.
Please don’t be put off by thinking it all looks a bit fiddly, it’s well worth a little practice to perfect your scarf turban. Our range of cancer scarves will keep you looking super chic during the day and they’re versatile enough to create an elegant evening wear look too. Colour as ever plays an important part here, all our colours are ‘dusky’ (dye process on this cotton) and hence flattering to the skin tone. Don’t be afraid to stray away from the safer neutral shades, jewel like colours will lift your complexion on a grey day. We seem to get these summer or winter here in the UK!
NB. To keep your scarf crinkly after washing in COLD water, don’t forget to twist it and whilst damp, lay it on top of a radiator to dry.
Feeling confident? Take your turban tying further with our intermediate wrap guide →